
Simple, fast, fun: three adjectives we often use to describe SketchUp. They also fit pretty well for Visualizer, an extension that provides instant photographic previews of SketchUp models and exports fast, clean photoreal images. You know, delicious stuff like this:
 |
| 3D Warehouse model of the Sydney Opera House, processed in about 60 seconds with Visualizer. |
I’ve been playing around with Visualizer since 3D Basecamp 2014, so this post is a collection of my impressions to date, and a few tips I’ve picked up on.
The first time you activate Visualizer, it feels a bit like turning on a photographic assistant inside SketchUp -- someone following your modeling work, quickly re-painting your sketches into polished scenes… while you’re orbiting and sketching. For me, it was a new -- and for sure, fun -- experience to tune into this instant feedback. (Incidentally, Visualizer costs $19.99 and starts with a 7-day free trial, so in a few clicks you can download it and see for yourself).
You’ll notice right away that Visualizer makes it one-click simple to create slick photorealistic images. We’re not talking about jaw-dropping renderings that take four hours to process in a server farm. The Visualizer team hasn’t built a rendering engine here; they’ve built, well, a visualization tool.
 |
| Visualizer’s controls are practical and simple. Click the lock icon at the bottom to prepare an image. Once it’s processed, click the camera icon to export. (Model: Arduino Uno by Engineer Zero) |
In fact, one of Visualizer’s more interesting uses is that it offers pretty quick photoreal previews of model compositions while you’re creating them. So whether you’re exporting images directly or planning to work up a high quality render in an entirely different (and probably more expensive) application, Visualizer is definitely useful for composing the SketchUp scenes you want to use and spinning up an instant photorealistic preview that may inform choices you make later on.
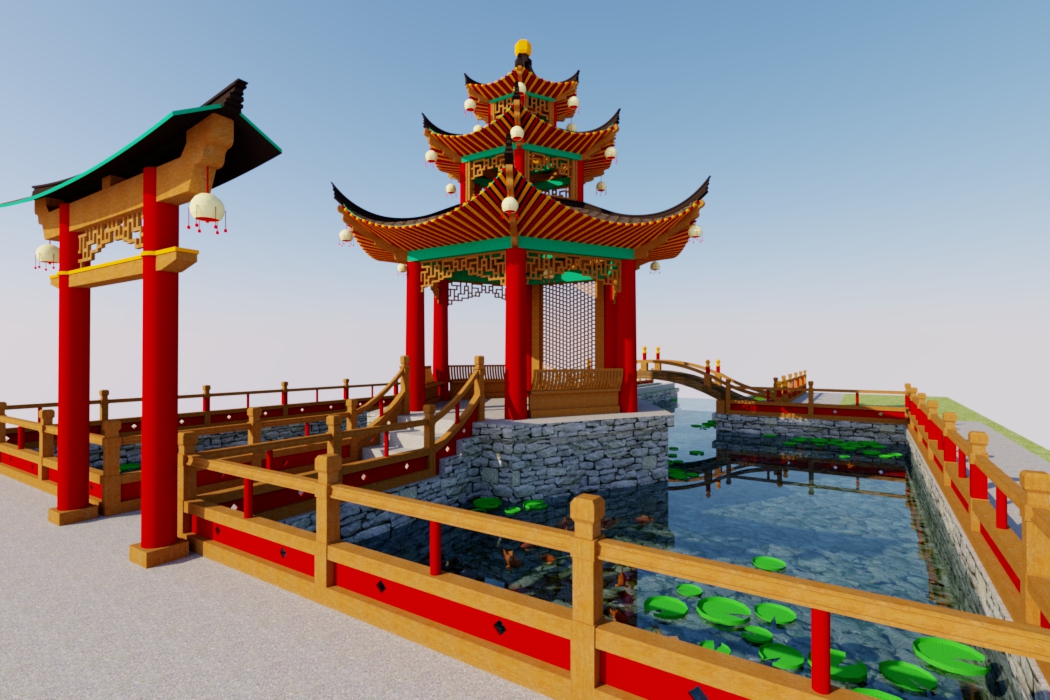 |
| Colors, textures, shadows: Visualizer has a knack for making them pop. (Model: Fish Pagoda by Sprucetree.) |
The Visualizer window scales to any size and can quickly match SketchUp’s viewport pixel-for-pixel. It’s tricky at first to figure out the best place to situate the window relative to your SketchUp model so that it doesn’t block your workspace. Ultimately, I settled on the upper right hand of my screen. I often choose to minimize Visualizer after locking the image for processing (more on that in a bit).
 |
| Visualizer can pin to the top of your desktop, so you can neatly preview your image while composing it in SketchUp. (Model: Wine rack unit by PFritz) |
I can’t pretend to fully understand how Visualizer’s ray tracing technology works, but I can vouch for the nerdy brilliance of the Visualizer team. These guys are pretty much obsessed with making Visualizer as simple as possible, and I found that effort coming through while using it. (If you happen to be interested in what’s happening under Visualizer’s hood, check out this interesting post from their parent company, Imagination Technologies).
Chatting with James and Suguru from Visualizer at 3D Basecamp, I got the sense that they were inspired by the camera app on smartphones (something almost everyone already knows how to use). And it turns out, that’s pretty much how Visualizer works. A simple click on the camera icon captures whatever’s on your screen and exports to JPG or PNG (with an option for transparent background).
Side note: Generally, I have no clue where files get saved to on my computer, but right next to Visualizer’s camera icon is a quick link to the folder where my images live. It’s also easy to customize directories from there, so people like me can easily clutter up their desktops.
 |
| Feeling frisky? Play around with Visualizer's auto-focus and exposure settings. |
A few other tips I’ve picked up on in my adventures with Visualizer:
Definitely use the image lock tool... a lot. For the highest quality images, it’s best to lock an image and let Visualizer decide when your image is ready. Visualizer will notify you when the image is fully baked. On my Macbook Pro, I’ve found that most images are done in two to three minutes.
SketchUp’s time of day slider is a secondary control panel for Visualizer. As far as I can tell, Visualizer light simulation takes its cues entirely from SketchUp shadow settings, so a lot of the nuance and warmth that you bake in Visualizer comes from SketchUp shadow settings.
There's even more control over Visualizer shadows in SketchUp’s Entity Info window. There, you can toggle a group or component’s ability to cast and receive shadows, and Visualizer will respect that choice.
Take the time to set-up and save your desired aspect ratios. It makes managing Visualizer’s window size pretty darn easy when you can immediately resize to the image dimensions of your desire.
There’s a bit more to explore in Visualizer -- you can tinker with camera focus and exposure too -- but I found Visualizer at its best when I kept things simple. Funny, SketchUp often works that way too.
Posted by Mark Harrison, SketchUp team

0 comments :
Post a Comment